

How to reshape wool hats: the complete home guide
TL;DR:
- Reshaping wool hats involves controlled steaming, gentle moulding, and a 24-hour curing process. Using proper tools and patience prevents damage and ensures the hat maintains its shape long-term. Proper storage and regular maintenance extend the reshaped form’s durability.
Reshaping wool hats is the process of using controlled steam and gentle moulding to restore or customise a hat’s fit and form. Wool fibres respond well to moist heat, which makes them pliable enough to manipulate without tearing or distorting the fabric. Once shaped and left to cure at room temperature, the fibres lock into their new position. This guide covers everything you need to know about how to reshape wool hats at home, from the tools you’ll need to the step-by-step steaming process, common mistakes to avoid, and long-term care tips that keep your hat looking sharp for years.
What tools do you need for reshaping wool hats?
Getting the right tools together before you start makes the whole process safer and more predictable. Rushing in with a kettle and bare hands is how hats get ruined.
- Handheld steamer or kettle. A handheld garment steamer gives you the most control. A kettle works as a substitute, but you’ll need to manage the steam distance carefully.
- Water spray bottle. Use this for light, even moistening when you need to soften a specific area without full steaming.
- Hat form or round object. A hat form or similarly sized round object supports even shaping and curing during and after steaming. A bowl, balloon, or rolled towel can substitute in a pinch.
- Heat-resistant gloves. Steam burns happen fast. Thick rubber or silicone gloves protect your hands while you mould the hat.
- Clean towels and a flat, ventilated drying area. You’ll need a clean surface where the hat can sit undisturbed for at least 24 hours after shaping.
- Optional: thermometer. Monitoring steam temperature helps you stay in the safe range for wool. Wool fibres respond well to moist heat but can be damaged by excessive temperatures.
Choosing the right steamer
A handheld garment steamer is the best tool for this job. It produces a consistent, controlled flow of steam that you can direct precisely at the crown, brim, or sides of the hat. Kettles work, but the steam output is harder to regulate and the risk of over-saturation is higher. If you’re using a kettle, hold the hat further away and work in shorter bursts.
| Tool | Best use | Substitute option |
|---|---|---|
| Handheld steamer | Full reshaping sessions | Kettle held at distance |
| Hat form | Crown and brim shaping | Bowl, balloon, rolled towel |
| Spray bottle | Spot moistening | Damp cloth |
| Heat-resistant gloves | Hand protection during moulding | Thick oven mitts |
| Flat drying rack | Ventilated curing | Clean towel on a table |
How to reshape wool hats step by step
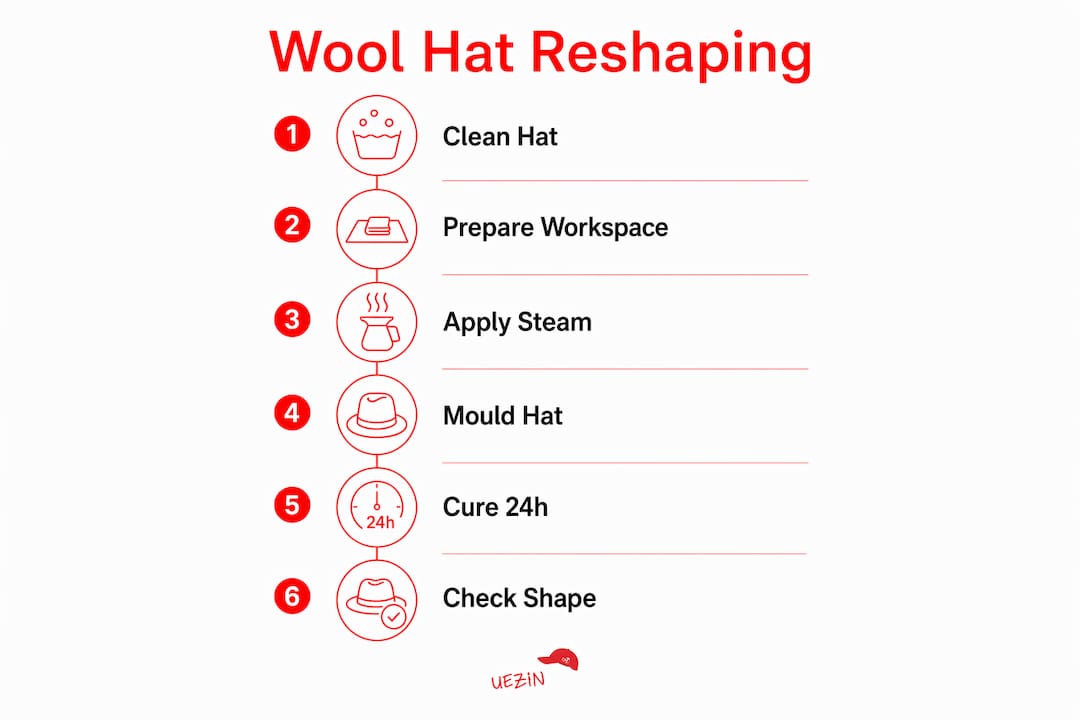
The standard industry method for reforming wool headwear combines controlled steam application with careful hand moulding and a full curing period. Skipping any step reduces the quality and durability of the result.
Step 1: Clean the hat first
Clean the hat with lukewarm water and a mild wool detergent before you apply any steam. Dirt and oils on the surface can work into the fibres when they’re softened by heat, leaving stains that are difficult to remove later. Rinse gently and let the hat dry completely before moving to the steaming stage. You can find more detail on safe cleaning routines in Urbancaps’ guide to wool hat care basics.
Step 2: Prepare your workspace
Set up your hat form or substitute object on a flat, stable surface. Place a clean towel underneath to catch any drips. Put on your heat-resistant gloves before you turn on the steamer. Good preparation means you won’t be scrambling mid-process when the hat is warm and pliable.
Step 3: Apply steam in controlled bursts
Hold the steamer 6–8 inches from the hat and apply steam in 3–5 second bursts. That distance and timing is the professional standard for controlled steam application. Move the steamer around the hat rather than holding it in one spot. Rotate the hat every few bursts so the steam penetrates evenly across the crown, brim, and sides.
Pro Tip: Work in sections. Steam the crown first, mould it, then move to the brim. Trying to reshape the whole hat at once leads to uneven results and risks over-saturating one area.
Step 4: Mould the hat by hand or on a form
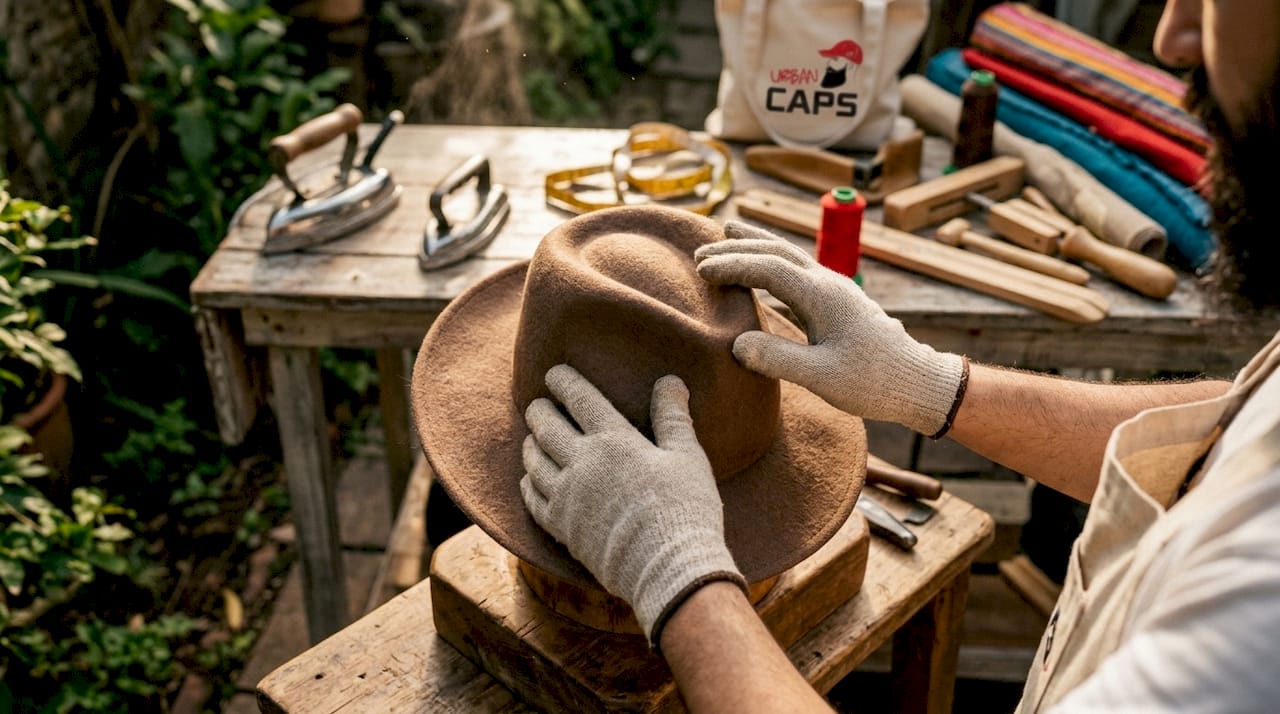
While the wool is still warm and supple, use your gloved hands to gently push and shape the crown and brim into the position you want. Press firmly but without forcing. Wool responds to steady, even pressure. If you’re using a hat form, place the hat over it immediately after steaming and press the fabric down to conform to the shape. For a wider brim, gently curve it upward or downward with both hands and hold the position for 30–60 seconds.
Step 5: Allow 24 hours of curing time
Leave the hat on the form or in its shaped position for at least 24 hours at room temperature. Controlled steam application followed by 24 hours of curing locks the new shape effectively. Do not rush this step. Handling the hat before it has fully cured risks undoing all your work. Keep it away from direct sunlight and heat sources during this period.
Step 6: Check and refine
Once the curing period is complete, check the shape. If one area hasn’t held as well as you’d like, repeat the steam and mould process on that section only. Minor touch-ups are normal and far preferable to a full re-steam of the entire hat.
What are the most common mistakes when reshaping wool hats?
Most reshaping failures come down to two things: too much moisture and not enough patience. Understanding where things go wrong helps you avoid them.
Over-steaming and saturation
Over-saturating wool felt by over-steaming washes out the structural sizing inside the hat, causing permanent loss of crisp shape once it dries. The structural sizing is what gives the brim its stiffness and the crown its form. Once it’s gone, no amount of reshaping will bring it back. Keep your steam bursts short and move constantly. The hat should feel warm and slightly damp, never wet.
- Never hold the steamer in one spot for more than 5 seconds.
- If the hat feels soaked, stop immediately and let it dry before continuing.
- Use a spray bottle for spot work rather than the steamer when you only need to soften a small area.
Applying direct heat
Wool requires no direct heat during reshaping. Placing a hat directly on a hot iron or holding it too close to a heat source causes irreversible damage to the fibres. Steam is moist heat delivered at a safe distance. That distinction matters. Direct dry heat scorches and compresses wool fibres in a way that cannot be undone.
Impatience during curing
Reshaping before the hat cools or forcing the shape causes microscopic fibre cracks that lead to permanent damage. Those cracks aren’t visible to the naked eye at first, but they weaken the fabric and cause the hat to lose shape faster over time. Set a timer and walk away.
“Most shaping failures stem from impatience and over-saturation. Professional milliners emphasise gentle, timed steps and proper curing for durability. The wool needs time to set, and forcing the process always costs more than it saves.”
Using too much force when moulding
Pressing too hard or pulling the brim aggressively creates creases and distortion that are difficult to fix. Wool responds to consistent, gentle pressure. If the hat isn’t moving into shape easily, it needs more steam, not more force.
How to fix minor problems after reshaping
If the brim has a small crease, apply a brief burst of steam directly to that spot and smooth it with your gloved fingers. If the crown has collapsed slightly, re-steam it and place it back on the form for another 12 hours. For general guidance on caring for different types of wool hats, the material type affects how much steam and pressure each hat can handle.
How do you maintain a wool hat’s shape long term?
Reshaping is only half the work. How you store and care for your hat after the process determines how long the new shape lasts. Good habits here save you from frequent re-steaming.
- Store on a hat rack or in a hat box. Stacking hats or leaving them brim-down on a shelf crushes the crown and distorts the brim over time. A dedicated hat rack or a box with tissue paper inside keeps the shape intact.
- Keep the hat away from direct sunlight. Proper hat storage away from direct sunlight and crushing objects is the single most effective way to maintain a reshaped hat’s form long term. UV exposure fades colour and weakens fibres.
- Avoid moisture exposure. Wool is more forgiving than many materials, but it loses shape more easily than fur felt when exposed to rain or humidity. If your hat gets wet, reshape it on a form immediately and let it dry naturally.
- Brush regularly with a soft hat brush. A soft-bristle brush removes dust and lint without disturbing the fibres. Brush in the direction of the nap, which is the natural grain of the wool surface.
- Use a lint roller for quick maintenance. Between brushings, a lint roller picks up surface debris without any risk of snagging the wool.
- Inspect the hat seasonally. Check the crown and brim every few months for early signs of shape loss. Catching a slight sag early means a quick touch-up steam rather than a full reshaping session.
When to use light steaming for maintenance
Light steaming can be used periodically for minor reshaping, but overuse causes fibre damage over time. Reserve the steamer for genuine shape corrections, not routine maintenance. For everyday upkeep, brushing and proper storage do the job without putting any stress on the fibres. If you’re maintaining a hat with an unusual construction or heritage-style brim, check Urbancaps’ wool hat style guide for material-specific advice.
For readers interested in broader fashion care routines that include headwear, gothic fashion care tips cover wool hat maintenance alongside other structured garments and accessories.
Key takeaways
Reshaping wool hats works best when you combine controlled steam, gentle moulding, and a full 24-hour cure, with careful storage and brushing to lock in the result long term.
| Point | Details |
|---|---|
| Steam distance and timing | Hold the steamer 6–8 inches away and apply 3–5 second bursts for safe, even results. |
| Curing time is non-negotiable | Leave the hat on a form for at least 24 hours before handling to lock in the new shape. |
| Avoid over-saturation | Over-steaming removes structural sizing and causes permanent limpness. |
| Direct heat causes damage | Never use a dry iron or hold a heat source directly against wool fibres. |
| Storage preserves the shape | Store on a hat rack or in a box, away from sunlight and moisture, to maintain the reshaped form. |
What I’ve learned from years of working with wool headwear
Most people who struggle with reshaping wool hats make the same mistake: they treat steam like a magic fix and expect instant results. Steam is a tool, not a solution. The solution is patience.
The first time I worked with a misshapen fedora, I over-steamed the crown trying to speed things up. The hat came out limp and structureless because I’d washed out the internal sizing. That mistake taught me more about wool construction than any guide ever did. The sizing is invisible, but it’s doing most of the structural work. Once it’s gone, you’re left with fabric, not a hat.
What I’ve found actually works is treating each reshaping session like a slow craft. Short steam bursts, constant movement, gentle pressure, and then leaving the hat completely alone for a full day. Beginners always want to check on it. Don’t. Every time you pick it up before it’s cured, you reset the process.
The other thing worth saying: not every wool hat reshapes the same way. Heavier wool felt holds a shape more stubbornly and needs slightly longer steam exposure. Lighter wool blends respond faster but are more prone to over-saturation. Get familiar with your specific hat before you commit to a full reshaping session. A small test on an inconspicuous area tells you a lot about how the material will behave.
Experimenting with brim angles and crown height is genuinely satisfying once you build confidence. A hat that fits your head and your style is worth the effort.
— Urban
Quality wool hats worth reshaping from Urbancaps

A well-made wool hat holds a reshaped form far better than a cheap one. The quality of the wool and the internal construction determine how well the hat responds to steaming and how long the new shape lasts. Urbancaps stocks a range of premium wool hats built for exactly this kind of hands-on customisation.
The Jazz Style Fedora is a strong starting point. It’s crafted from quality wool felt with a structured brim that responds well to steam moulding, making it ideal for readers who want to personalise the brim angle or refine the crown shape. Urbancaps delivers across New Zealand with fast local shipping, so your next reshaping project is never far away.
FAQ
How long does it take to reshape a wool hat?
The active reshaping process takes 10–20 minutes, but the hat needs at least 24 hours of curing time on a form before it holds its new shape reliably.
Can you reshape a wool hat without a steamer?
A kettle produces enough steam to soften wool fibres, though it’s harder to control than a handheld steamer. Hold the hat at least 6–8 inches from the spout and work in short bursts to avoid over-saturation.
How do you clean a wool hat before reshaping?
Use lukewarm water and a mild wool detergent, applied gently with a soft cloth. Rinse carefully and let the hat dry completely before steaming.
How often can you steam a wool hat?
Steam reshaping frequency should be limited to avoid fibre damage. Reserve steaming for genuine shape corrections and rely on brushing and proper storage for routine maintenance.
Will reshaping damage my wool hat?
Reshaping done correctly with controlled steam, no direct heat, and a full curing period does not damage wool. The risks come from over-saturation, direct heat, and handling the hat before it has fully set.