


Stop After 3 Passes: Clean a Leather Hat by Its Finish
Clean a leather hat by dry-brushing off loose dirt first, then spot-cleaning with a barely damp microfibre cloth and a leather-safe, pH-balanced cleaner, only where you actually need it. Skip soaking and skip heat when drying. Patch-test any product first, and once the leather is dry to the touch, condition it sparingly to keep it supple.
TL;DR:
- Dry-brushing the hat first removes surface grit without embedding dirt, which preserves the leather’s finish during cleaning.
- Spot-clean marks with a barely damp cloth and a leather-safe cleaner, avoiding excess moisture that can damage or stain suede and nubuck.
- Condition the leather only after it is fully dry, using thin layers that restore flexibility without darkening or flattening the finish.
- Water and heavy scrubbing can cause swelling, stiffness, or cracks, so avoid soaking or aggressive removal methods, especially on vintage or delicate hats.
- Weatherproof and waterproof hats reduce maintenance needs, making regular conditioning and cleaning unnecessary for outdoor use.
Table of Contents
- How do you clean a leather hat based on its finish?
- The safe, step-by-step way to clean a leather hat
- How do you get stains out of a leather hat?
- When should you condition and waterproof a leather hat?
- How do you dry, reshape and store a leather hat properly?
- What tools and products do you actually need?
- Where this care advice comes from
- When to DIY and when to call a professional
- Weatherproof and leather-look hats worth considering
- Sources
- FAQ
How do you clean a leather hat based on its finish?
Not every leather hat responds to the same clean. Smooth, pigmented leather has a sealed, slightly shiny surface, and it usually tolerates a damp microfibre cloth and a mild leather cleaner without drama. Oiled or tumbled leather looks softer and more matte, with a grain that moves. It handles cleaning and conditioning reasonably well too, but it drinks up product faster, so go lighter than you think you need to.
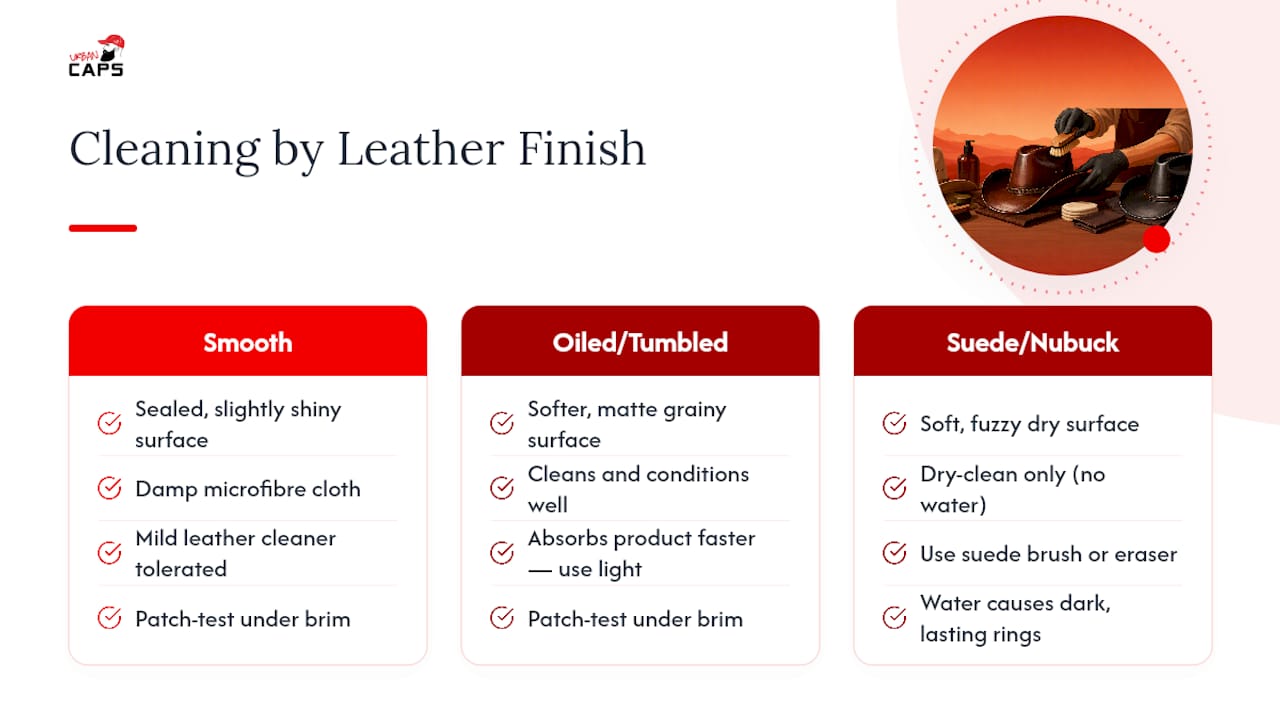
Suede and nubuck are a different animal entirely. Both are dry-clean only. Water leaves dark rings that don’t lift, and the fix usually involves a suede brush or eraser rather than any liquid product. If you’re not sure what you’re working with, run a finger across the surface. Smooth and shiny means pigmented leather. Soft and fuzzy means suede.
Before using any cleaner, patch-test on an inconspicuous spot, such as under the brim, and let it dry fully. Watch for darkening or a change in sheen. If that happens on the test patch, it will happen on the whole hat.
The safe, step-by-step way to clean a leather hat
This sequence works for most smooth and oiled leather hats, and it’s worth following in order rather than skipping ahead to the cloth and cleaner.
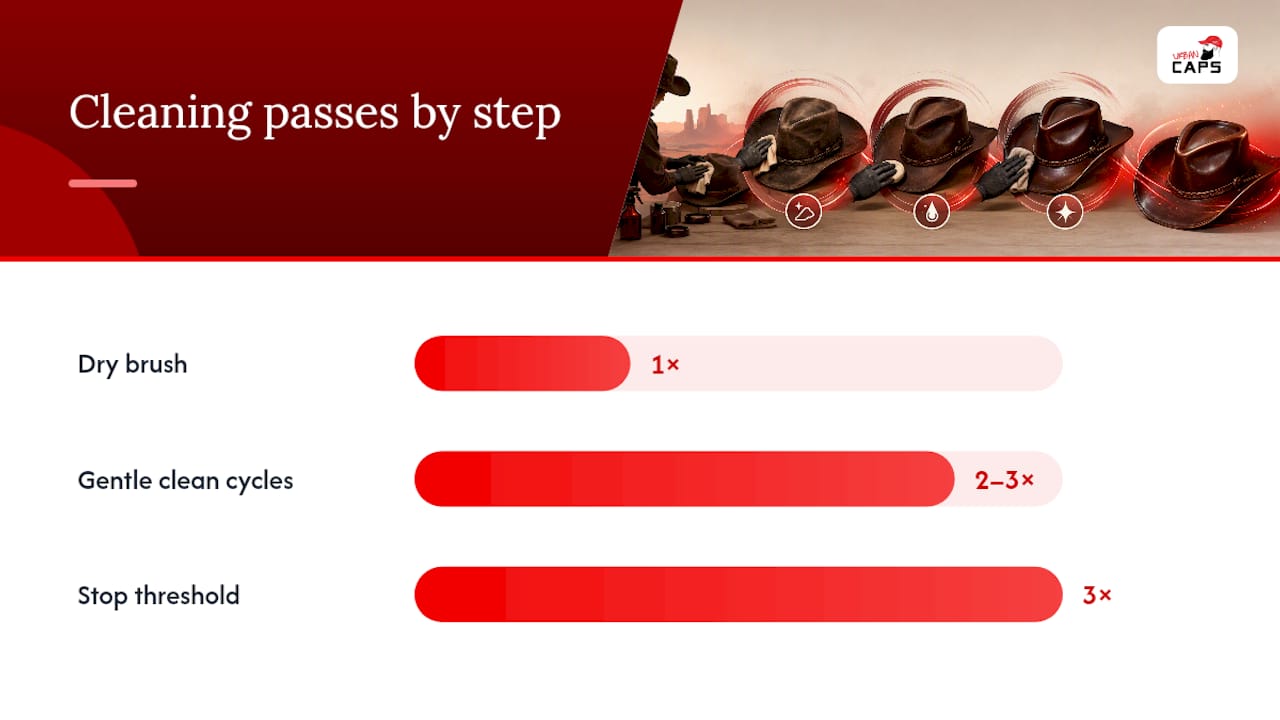
- Dry-brush first. Use a soft-bristle brush to lift dust, grit and surface debris. This step matters more than people assume, because adding moisture before brushing just grinds grit into the leather instead of lifting it off.
- Check what you’re dealing with. Surface dust needs nothing more than the brush. Marks, oils or stains need the next steps.
- Spot-clean with minimal moisture. Wring a microfibre cloth until it’s barely damp, add a small amount of leather-safe cleaner, and work the mark in gentle circles rather than one hard scrub.
- Blot, don’t rub. Lift the residue away with a dry section of cloth. Repeat the damp-then-dry cycle two or three times on stubborn marks instead of pressing harder once.
- Air-dry completely before doing anything else, including conditioning.
- Condition thinly, but only if the leather feels dry or tight once it’s fully dried.
Scrubbing hard in one go feels productive, but it’s usually what pushes a stain deeper into the grain. Several light passes beat one aggressive one, every time.
Pro Tip: If a mark hasn’t lifted after three gentle cleaning passes, stop. Leather that’s been over-worked with cleaner starts to lose its finish, and at that point you’re better off asking a professional restorer than pushing further yourself.
Deep dye loss, cracking, or a hat that’s been soaked and gone stiff are jobs for a leather specialist, not a home remedy.
How do you get stains out of a leather hat?
Different marks need different tactics, and treating them the same way is how a small stain becomes a bigger problem.
- Sweat marks: Focus on the inner sweatband with a wrung-out damp cloth. Repeat gentle wipes rather than scrubbing, and for set-in salt lines, a very light mix of diluted vinegar on the cloth can help lift the residue before you switch to a leather-safe cleaner.
- Oil and grease: Sprinkle cornstarch or baking soda over the mark and leave it to draw the oil out for a few hours before brushing it away and cleaning as normal.
- Ink: Treat ink cautiously. There’s no reliable home fix that won’t risk spreading it further into the grain, so for anything beyond a light surface mark, a professional cleaner is the safer call.
- Water rings: Dampen the entire panel evenly, not just the ring, so the leather dries at a consistent rate and doesn’t leave a visible halo where the wet meets the dry.
Pro Tip: Always dry the sweatband fully before you put the hat away. Trapped moisture near the band is one of the most common causes of a musty smell developing later. If odour is already a problem, our guide on how to remove hat odour covers safe deodorising steps that won’t damage the leather.
When should you condition and waterproof a leather hat?
Condition only once the leather is dry to the touch, never while it’s still damp from cleaning. Apply the conditioner in a thin layer, let it absorb for a few minutes, then buff off any excess with a clean cloth.
- Cream and liquid conditioners suit smooth and oiled leather, restoring flexibility without leaving a heavy film.
- Skip oil-based conditioners on suede or nubuck altogether. They flatten the nap and darken the surface permanently.
- A leather-safe waterproofing spray goes on after cleaning and conditioning, never before, and it needs reapplying periodically, particularly if the hat sees regular outdoor wear.
If you’re after a hat that skips this step altogether, it’s worth looking at options built to be water resistant from the start.
How do you dry, reshape and store a leather hat properly?
Air-dry on a hat stand or another rounded, shaped support so the crown keeps its form as it dries. Keep it away from direct sun, heaters and any other direct heat source. Heat is one of the fastest ways to turn supple leather stiff and brittle, right alongside soaking it, which causes swelling and warping the same way.
If the crown has lost its shape, stuff it gently with acid-free tissue while it dries. A light steam treatment can help ease out dents on finishes that tolerate moisture, but skip this entirely on suede. Support the brim flat or on its natural curve rather than letting it rest at an odd angle.
For storage, use a breathable cover in a low-humidity spot, and never stack hats on top of each other. Our hat care checklist is a handy one to keep on hand for routine upkeep between deeper cleans.
What tools and products do you actually need?
You don’t need a large kit, just the right handful of items:
- A soft-bristle brush for dry dust and grit
- Two or three clean microfibre cloths
- Cornstarch or baking soda for oil absorption
- A hat stand or shaped support for drying
- A mild, pH-balanced leather cleaner
- A leather conditioner suited to your hat’s finish
Labels matter here. “pH-balanced” and “leather-safe” aren’t just marketing terms. They signal a product formulated not to strip natural oils or leave leather patchy. Avoid anything containing alcohol, since it dries leather out fast and can leave permanent discolouration.
If you’re shopping for a hat rather than restoring one, Urbancaps stocks a few options worth knowing. The Waterproof Vegan Leather Bucket Hat suits anyone who wants rain protection without the upkeep of natural leather. The Reversible Leather Bucket Hat gives you two looks in one waterproof piece. For a more classic finish, the leather bucket hat with a refined, subtle look covers everyday wear without shouting for attention.
Where this care advice comes from
Urbancaps publishes ongoing hat-care guidance drawn from everyday customer questions, including deeper dives like how to remove sweat stains and general hat-cleaning best practice. This piece follows the same conservative, finish-aware approach used across those resources.
When to DIY and when to call a professional
Age, value and finish sensitivity should guide the decision. A recent, everyday hat with a surface mark is a fair DIY job. A vintage or suede piece, or one with deep dye loss and structural damage, isn’t. Professional restorers can rebuild shape, correct colour and repair structure. A cloth and cleaner can’t.
Weatherproof and leather-look hats worth considering
If cleaning and conditioning sounds like more upkeep than you’re after, a weatherproof option cuts down the maintenance considerably. The Waterproof Vegan Leather Bucket Hat is built for wet-weather wear without the drying and conditioning routine natural leather needs.
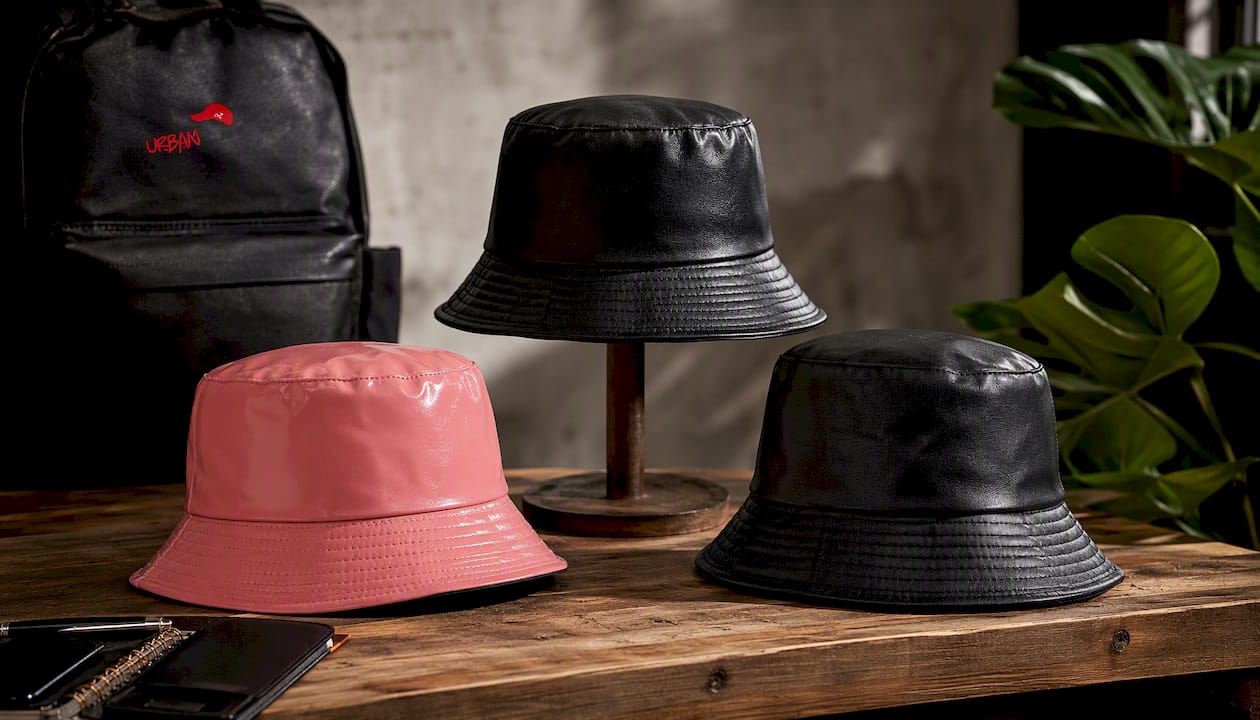
For versatility, the Reversible Leather Bucket Hat gives you two styles from one waterproof piece, handy if you want a single hat that adapts to more outfits. If you’d rather stick with a leather look and classic shape, the leather bucket hat with a timeless, refined finish delivers that, and every cleaning and conditioning step covered above applies to it the same way.
Browse the current range and pick the hat that matches how you actually plan to wear it, then keep the care blog bookmarked for product-specific upkeep tips down the track.
Sources
- How to clean a leather hat: Simple step-by-step care - CleaningBro
- How to restore leather hats | Angelus Direct
- How to clean a leather hat in just a few steps – Leather Advice
FAQ
What is the best way to clean a leather hat?
Dry-brush first to remove grit, then spot-clean marks with a barely damp microfibre cloth and a leather-safe cleaner. Air-dry away from heat, then condition sparingly once dry.
Can a leather hat be ruined if it gets wet?
Light rain usually causes no lasting harm if it’s dried properly away from heat, but soaking or drying near a heater can cause swelling, stiffness and cracking.
How can I remove sweat stains from my leather hat?
Wipe the inner sweatband with a wrung-out damp cloth, repeating gentle passes rather than scrubbing, then air-dry fully before conditioning. For deeper detail, see our guide on removing sweat stains.
What is the best leather conditioner for a leather hat?
Choose a conditioner matched to the finish, cream or liquid for smooth and oiled leather, and avoid oil-based products on suede or nubuck entirely. Apply thin layers only once the leather is fully dry.