

Manufacturer Advice: Oilskin Hat Care That Won't Strip the Wax
Keep an oilskin hat weatherproof with a short list of habits: brush off dry dirt, spot-clean with cold water only, air-dry away from heat, and reproof the moment water stops beading on the surface. Store it somewhere ventilated, never in a sealed bag. Skip soap, detergent, machine washing, dry cleaning, direct heat, and leather oils. These products strip the wax finish faster than everyday wear ever will.
TL;DR:
- Reproof the hat regularly, roughly every 12 to 18 months for occasional wear, or every few months under heavy, wet conditions.
- Use a waxed cotton-specific dressing like Duckback Dressing, applied in thin layers with gentle heat, to maintain water resistance.
- Always test water beadability to check if reproofing is needed; a soaked patch indicates it’s time to reapply wax.
- Avoid washing machines, dry cleaning, or using detergents, as they strip the wax finish and reduce waterproofing.
- Store the hat in a ventilated space after drying thoroughly, never sealed in plastic, to prevent mould and preserve the wax coating.
Table of Contents
- Everyday oilskin hat care: cleaning without stripping the finish
- How should you dry an oilskin hat after it gets wet?
- When does an oilskin hat need reproofing?
- Step-by-step reproofing: products, technique and curing time
- Fixing mould, stains, cracks and scuffs
- Storing and travelling with an oilskin hat
- Why manufacturer instructions matter more than internet folklore
- What tools and materials do you actually need?
- Our take: the fuss around oilskin care is overblown
- Want an easy-care hat without the reproofing routine?
- Sources
- FAQ
Everyday oilskin hat care: cleaning without stripping the finish
Most of what lands on an oilskin hat is dry once you get to it. Mud, dust, and trail grit brush off far more easily after they’ve dried than while they’re still wet and smeared into the fibres, so resist the urge to wipe a muddy hat straight away. Let it dry, then work a soft brush or clean cloth over the surface in the direction of the weave.
Wet marks need a gentler touch. Dampen a cloth with cold water, wring it out well, and blot the mark rather than scrubbing. Scrubbing pushes dirt deeper into the weave and can wear down the wax coating in that one spot faster than the rest of the hat.
If a stain needs more than a blot, plain soap is the ceiling, not detergent, and definitely not a machine cycle. Driza-Bone’s own garment care guidance is blunt about this: hot water, detergents, machine washing, and dry cleaning all strip the oil and wax finish that makes an oilskin hat waterproof in the first place. Once that finish is gone, no amount of brushing brings it back. Only reproofing does.
Salt spray and sweat marks deserve quicker attention than mud. Left to dry in, salt crystallises into the fibres and can leave a stiff, whitish residue that’s harder to shift later. Rinse lightly with cold water as soon as you’re back indoors rather than waiting until the next clean.
- Brush dry mud and dust off before it’s wiped in.
- Blot stains with a cold, damp cloth; never scrub.
- Rinse salt spray and sweat marks promptly, before they dry into the weave.
- Use plain soap sparingly for stubborn marks, never detergent.
- Skip the washing machine and dry cleaner entirely.
Pro Tip: Keep a soft-bristled shoe brush or a dedicated hat brush by the door. A thirty-second brush-down after every wear does more for the finish than any deep clean ever will.
How should you dry an oilskin hat after it gets wet?
Dry it slowly, at room temperature, out of the sun. Oilskin’s wax coating is sensitive to heat, and rushing the process is the fastest way to crack or discolour it.
- Shake the hat gently to knock off loose surface water, then blot with a dry cloth. Never wring it. Wringing distorts the brim and crown shape, and that shape rarely sits right again.
- Set the hat on a hat stand, or stuff the crown loosely with a clean towel to hold its shape while it dries.
- Leave it at room temperature, away from radiators, fireplaces, and direct sunlight. Outback Trading’s care advice recommends simple air drying as the standard approach, and for good reason: it’s the one method that doesn’t risk the finish.
- Check it after a few hours and reshape the brim by hand if it’s started to sit oddly.
- Only reach for a hairdryer on its lowest, coolest setting, and only when you’re setting a fresh coat of reproofer, not drying a soaked hat.
Direct heat is the real enemy here, not moisture. A heater or an open flame can melt the wax unevenly, leaving patches that go dull, sticky, or brittle. Direct sun does the same over time, breaking down the oils that keep the cloth flexible. A hat dried slowly on a shelf away from a window will outlast one dried “quickly” next to a heater by a wide margin.
When does an oilskin hat need reproofing?
The simplest test takes ten seconds: flick a few drops of water onto the crown. If they bead up and roll off, the finish is doing its job. If they soak in or spread into a dark patch, it’s time to reproof.
Beyond the bead test, watch for these signs between checks:
- Fabric that looks dry, dusty, or faded rather than slightly sheeted.
- Patchy water resistance, where some panels bead and others soak through.
- Stiffness or fine cracking at fold lines, especially around the brim edge.
- A general loss of that slightly tacky, supple feel oilskin has when it’s freshly waxed.
Frequency depends entirely on how hard the hat works. A hat worn daily on a farm, boat, or building site in genuinely wet conditions might need reproofing every few months. Outback Trading notes that oilskin is built to be worn hard and asks for little beyond occasional cleaning and reproofing, which is a fair description of how low-maintenance it is under normal use. For occasional wear, roughly every 12 to 18 months is a reasonable rule of thumb, adjusted for how often it actually gets wet.
Small, regular top-ups beat waiting for the fabric to fail. Letting a hat go bone dry and brittle before reproofing means the wax has to work harder to rehydrate cracked fibres, and some of that damage doesn’t fully reverse. A light reproof every season, focused on the areas that see the most weather, is far easier on the hat than one big rescue job every few years.
Step-by-step reproofing: products, technique and curing time
Reach for a dressing made specifically for waxed cotton or oilskin. NZ Tack recommends products like Duckback Dressing for exactly this job, warmed slightly and applied in a thin, even layer with gentle heat to help it soak in. Leather oils, saddle soap, and general fabric conditioners are the wrong tool. They’re formulated for a different material entirely and can leave an oilskin hat sticky, discoloured, or worse at repelling water than before you started.
Set up before you open the tin. You’ll want:
- A soft-bristled brush or lint-free cloth for application.
- A bowl of hot (not boiling) water to warm the wax tin, since a microwave can overheat it unevenly.
- A well-ventilated space, ideally outdoors or near an open window, since the process does have a smell.
- Disposable gloves, unless you enjoy scrubbing wax off your hands for two days.
To apply, warm the tin in the hot water bath for a few minutes until the wax softens slightly. Allingtons’ reproofing guide describes exactly this approach: soften the wax, then work it in with a soft brush or cloth rather than pouring it straight from the tin. Apply in thin coats rather than one heavy pass. Pay particular attention to seams, the underside of the brim, and any high-wear points like where your fingers grip the crown, since these areas dry out first and fail first.
Resist the urge to load the fabric with product. A thick coat looks thorough but leaves a tacky surface that attracts dust and dirt rather than repelling water any better than a thin one. Once the coat is on, gentle heat, a hairdryer on its lowest setting, or a warm (not hot) day outdoors, helps the wax penetrate the weave rather than sitting on top of it.
Pro Tip: Do a second thin coat rather than one thick one if the fabric still looks dry after the first pass. Two light layers penetrate better than one heavy layer and won’t leave that stiff, waxy surface feel.
Let the hat cool and cure fully before wearing it. This can take several hours. Wearing it too soon transfers half the wax to your hands and hair, and the finish never sets properly where it rubbed off.
Fixing mould, stains, cracks and scuffs
Mould is more common than most owners expect, especially on hats stored damp or in humid sheds. Brush off the surface growth outdoors first, so spores don’t spread indoors. Then sponge the affected area with a diluted vinegar solution, roughly one part vinegar to twenty parts water, rinse lightly with a clean damp cloth, and air-dry fully before reproofing. Skipping the reproof step after any wet treatment leaves the hat more vulnerable than before you started.
Not every stain needs the same response:
- Dust, mud, and light grime: cold water and a soft brush handles it.
- Salt or sweat marks: rinse promptly with cold water before they set.
- Mould or mildew: diluted vinegar, then a full reproof once dry.
- Deep oil, grease, or ingrained stains: these are best left to a specialist rather than risking the finish with stronger solvents at home.
Cracked or worn wax usually responds well to a fresh reproof before you consider anything more drastic. A light coat softens brittle patches and restores flexibility in most cases. Genuine structural damage, a torn seam or a badly cracked brim edge, is a job for a professional repairer rather than a DIY fix, since mechanical repairs on oilskin need the right thread and technique to hold. Once any seam repair is done, reproof that section so the stitching sits under the same protective coat as the rest of the hat.
Storing and travelling with an oilskin hat
Storage mistakes undo good cleaning habits fast. A damp hat sealed in a plastic bag is close to ideal conditions for mould, so let the hat dry completely before it goes anywhere near storage.
- Store on a hat stand or a wide hanger that supports the crown’s shape, not stacked flat.
- Choose a cool, dry, ventilated spot, a closet shelf with airflow beats a sealed box every time.
- Use a breathable cotton cover if you want dust protection, never plastic.
- When travelling, pack the hat crown up in a hard case or stuff it with soft clothing to hold its shape against compression.
- After long storage, months rather than weeks, check for that beading test and give it a light reproof if needed before wearing it out.
A related hat care checklist covers the same storage principles for other hat types if you’re managing a mixed collection.
Why manufacturer instructions matter more than internet folklore
Oilskin hat care advice online varies wildly, and a lot of it contradicts itself. The most reliable source is always the maker of the fabric or the finished hat, because they know exactly what’s in the coating and what breaks it down. Swanndri’s own care guide repeats the same core rules you’ll find across the industry: no machine washing, no hot water, no detergents, spot-clean and air-dry instead, and check regularly for dryness.
Urbancaps builds its own care guidance around those same manufacturer rules rather than inventing shortcuts, because a wax finish doesn’t care whose website the advice came from, only whether the method respects the coating. Our broader weatherproof hat maintenance guide and general hat cleaning techniques walk through related methods for other materials if oilskin is one hat in a wider collection.
If you’re unsure whether a specific product needs a different reproofing schedule or product type, our support team can point you to the right approach for the exact hat you’re maintaining.
What tools and materials do you actually need?
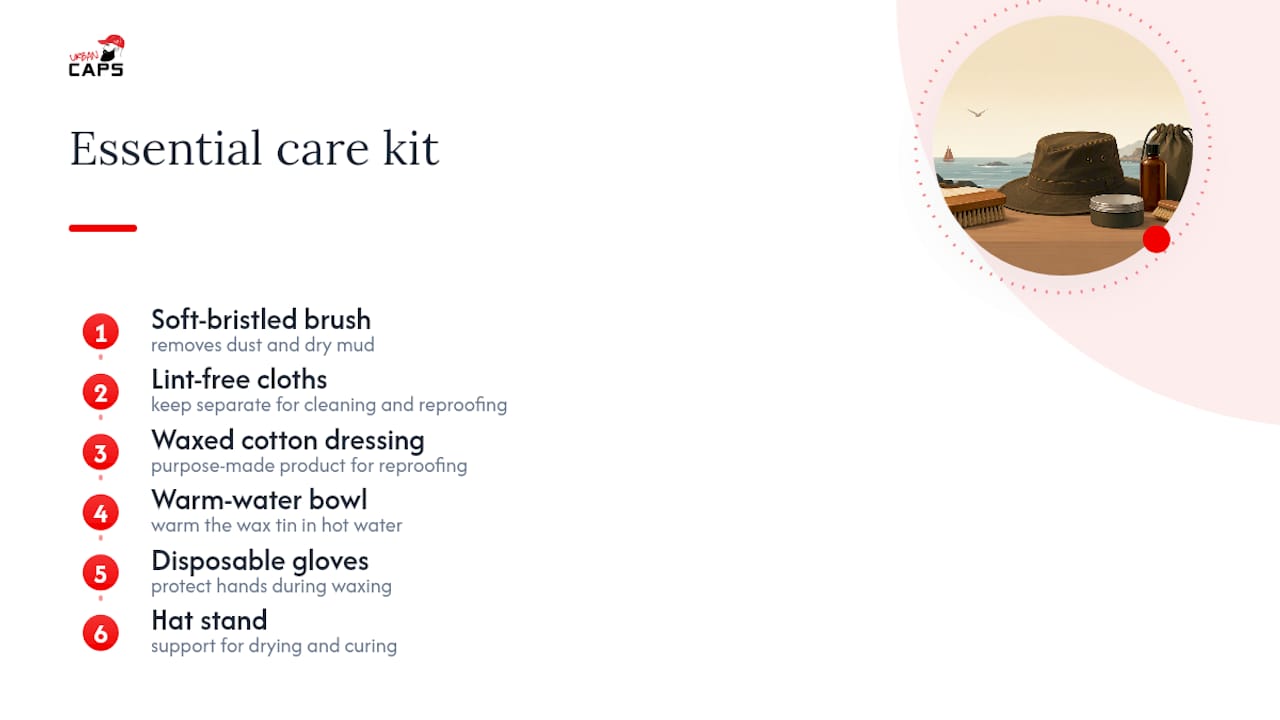
You don’t need much, which is part of oilskin’s appeal. A soft-bristled brush handles routine dust and dry mud. A couple of clean, lint-free cloths cover blotting and wax application, and it’s worth keeping separate cloths for cleaning and reproofing so you’re not spreading wax where you’re trying to clean.
For reproofing itself, a purpose-made waxed cotton dressing is the one product worth spending on. A small bowl for warming the wax tin in hot water, a pair of disposable gloves, and a hat stand or supportive form for drying and curing round out the kit. None of it is expensive, and most of it does double duty across other leather and waxed cotton gear around the house.
What you don’t need is a cupboard full of specialty cleaners. Cold water, plain soap for the rare stubborn mark, and a dedicated dressing cover the vast majority of care needs. Buying leather conditioners, all-purpose fabric protectors, or waterproofing sprays not designed for waxed cotton is more likely to cause problems than solve them, since these products are formulated for entirely different materials and can interact badly with the wax already in the weave.
Our take: the fuss around oilskin care is overblown
Most of the anxiety around oilskin hat care comes from treating it like leather, which it isn’t, or like a technical waterproof fabric, which it also isn’t. It’s wax-impregnated cotton, and it responds best to the simplest possible routine: brush, cold water, air, and reproof when it asks for it.
Where a lot of advice goes wrong is timing. Owners either over-clean, reaching for soap on marks that a brush would have handled, or under-maintain, waiting until the hat is visibly failing before reaching for a reproofer. Both extremes shorten the hat’s working life. The better habit is a quick bead test every few weeks during heavy use and a light reproof the moment it fails, rather than a big rescue job once a year.
If you take one thing from this guide, prioritise the reproofing schedule over the cleaning routine. A hat that’s cleaned perfectly but never reproofed will still fail at the one job it’s meant to do.
— Urban
Want an easy-care hat without the reproofing routine?
If keeping to a reproofing schedule sounds like more upkeep than you want, Urbancaps stocks styles built around the same weathered, oilskin aesthetic with far less maintenance involved. The Oilskin Cap gives you a lightweight, structured 6-panel fit with genuine water resistance for everyday wear.
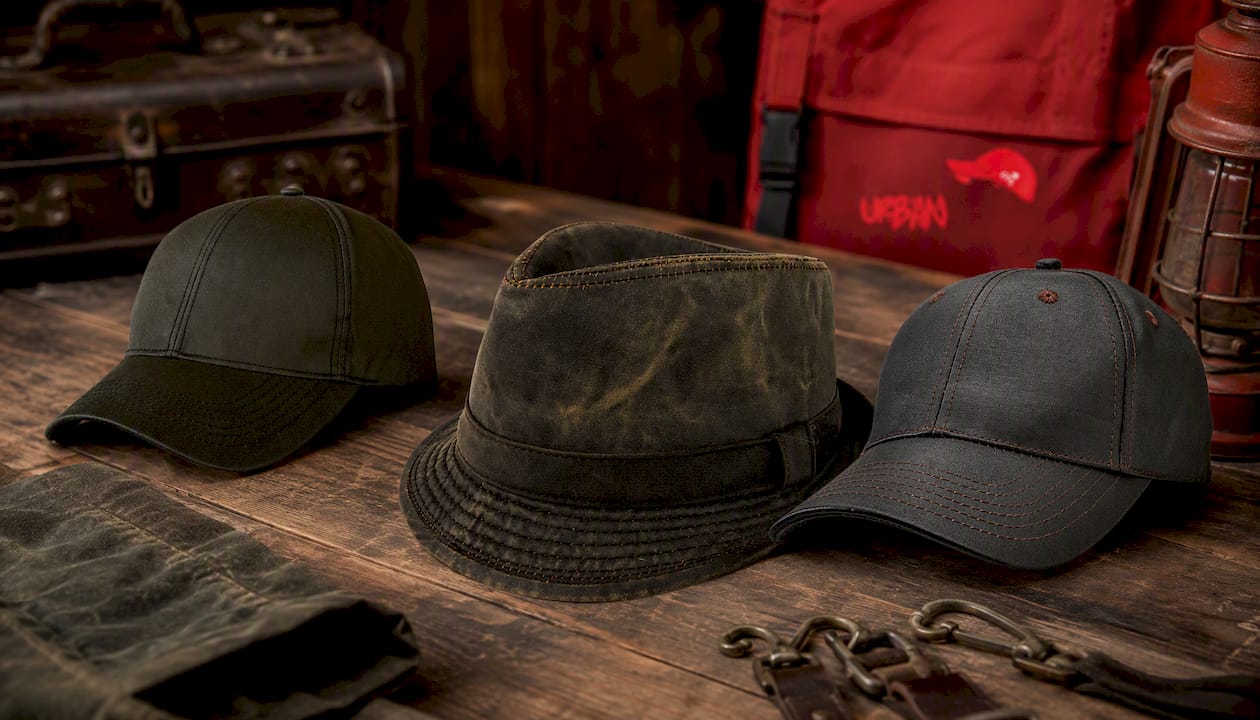
If you want the distressed, weathered look without babysitting a wax finish, the Bosley Trilby delivers a water-repellent cotton finish in a classic trilby shape. For a harder-wearing option that leans into the rigger style, the Rigger Cap uses a PU-coated finish with the oilskin look but a simpler wipe-down routine day to day. The company is locally owned and operated, offering shipping within New Zealand, with support available for sizing or care questions after purchase. Browse the Oilskin Cap range now to find your size and get it on its way.
Sources
- Break in your oilskin – NZ Tack
- Garment care | Driza-Bone
- How to care for an oilskin hat – Outback Trading
- Care guide: Oilskin – Swanndri
FAQ
Are oilskin hats waterproof?
They’re water resistant rather than fully waterproof. The wax coating sheds light rain and spray effectively, but prolonged, heavy soaking will eventually get through, and the finish needs regular reproofing to keep performing.
How do you re-waterproof an oilskin hat?
Warm a waxed cotton dressing like Duckback slightly, apply a thin, even coat with a soft brush focused on seams and the brim, then use gentle heat to help the wax penetrate before letting it cure fully.
How do you care for an oilskin hat day to day?
Brush off dry dirt regularly, spot-clean marks with cold water only, air-dry away from heat and sun, and store it ventilated rather than in a sealed bag. Avoid soap, detergent, and machine washing entirely.
What’s the best oilskin reproofer to use?
A dressing made specifically for waxed cotton, such as Duckback Dressing, is the standard recommendation. Leather oils and general fabric conditioners aren’t suited to oilskin and can damage the finish rather than restore it.