


Under $20 Parts vs USD 50 to USD 150: Replacing a Hat Sweatband in NZ
Most worn or torn sweatbands are safe to replace yourself if the hat is a casual felt or straw piece you wear often, with parts costing under $20 and an afternoon of careful stitching. Send anything vintage, welted, or sentimental to a professional hatter instead, where full service typically runs in the mid to high price range of professional repairs. Either way, your first move is the same: inspect the band, then buy a replacement or book a repairer.
TL;DR:
- Replacing a sweatband yourself costs under $20 for parts and takes about 2 to 4 hours, suitable for casual felt or straw hats.
- Professional repairs, including cleaning and reblocking, typically range from $50 to over $150 and take one to three weeks, ideal for vintage or high-end hats.
- Cotton terry absorbs the most sweat and is best for outdoor activities, while genuine leather offers durability and requires regular conditioning.
- Using pre-made leather or terry bands simplifies DIY replacement, as they are already sized, requiring only trimming and stitching.
- Shipping costs and labor are the main factors influencing the final price, often exceeding the part cost by a significant margin.
Table of Contents
- What are your options for replacing a hat sweatband?
- How much does it cost to replace a hat sweatband?
- Which sweatband material should you choose?
- How do you replace a hat sweatband step by step?
- How do you fit and finish the sweatband properly?
- Where can Urbancaps help beyond the repair itself?
- Should you mend it or replace it?
- Ready to replace rather than repair? Here’s where to look
- Where can you learn more or find real cost examples?
- Sources
- FAQ
What are your options for replacing a hat sweatband?
You’ve got three real paths here, and picking the wrong one wastes either money or a good hat.
DIY replacement suits anyone with basic sewing skills and a couple of hours to spare. You’ll need a seam ripper, needle, waxed thread, and a replacement band cut to size. Straw and casual felt hats forgive small mistakes; expect two to four hours including fiddly bits like reeding.
Buying a pre-made band and installing it yourself is the middle ground. You get factory-cut leather, terry, or twill already sized close to standard head measurements, so you’re only trimming and stitching, not cutting from scratch. This works well when the hat itself is solid but the sweatband alone has perished.
Professional repair earns its keep on anything with sentimental or genuine dollar value: felted wool fedoras with welted (stitched-edge) bands, vintage pieces needing reblocking, or hats where a botched DIY job would tank the resale value. Turnaround with a hatter usually runs one to three weeks once you factor in shipping both ways.
- DIY: 2 to 4 hours, cheapest, best for casual hats
- Buy and install: 1 to 2 hours, moderate cost, good middle ground
- Professional: 1 to 3 weeks, highest cost, best for valuable or structurally complex hats
How much does it cost to replace a hat sweatband?
Parts alone are cheap. Service is where the money goes.
A basic sweatband replacement from a hatter, no reblocking, no deep clean, generally lands at the lower end of that USD 50 to USD 150 range reported across repair forums. Add a full clean and reblock and you’re pushing toward the top of that bracket. Premium restoration work on vintage or high-end felt, including reshaping the crown and matching period-correct leather, can exceed it once shipping both directions is factored in.
- Replacement band only (DIY): often under $20 for the part
- Basic professional replacement: generally at professional repair rates higher than part cost alone
- Clean plus reblock: middle to upper end of that range
- Full restoration on vintage hats: can exceed $150 once shipping is added
The real driver of your final bill isn’t the band, it’s the freight. Forum reports note that decent replacement parts can cost under $20, yet shipping and installation labour routinely push total service cost well beyond the part price. Spending more only makes sense when the hat’s shape, felt quality, or sentimental value justifies restoration rather than a straight swap.
Which sweatband material should you choose?
The material decides how the hat feels after a full day, not just how it looks.
Cotton terry absorbs the most sweat and suits anyone wearing a hat outdoors for hours, gardening, fishing, farm work. Cotton twill costs less and holds up fine for casual or occasional wear, though it won’t wick moisture as well. PU leather repels moisture rather than absorbing it, which sounds handy until you realise it tends to crack sooner than genuine leather according to material comparisons from cap manufacturers. Genuine leather sits in the middle: durable, breaks in nicely, but needs occasional conditioning.
Thickness matters more than most people expect. A thicker terry band can shave several millimetres off your usable crown space, so if your hat already fits snugly, a thinner twill or leather band keeps the fit true to what you’re used to.
- Terry: best absorbency, best for active outdoor wear
- Twill: cheaper, adequate for casual wear, lower absorbency
- PU leather: water-resistant, cracks sooner than genuine leather
- Genuine leather: durable and classic, needs conditioning over time
For tools, you’ll want a metal ferrule for joining leather reeding, an awl for pre-punching stitch holes, a heavy needle, and waxed thread as detailed in leather sweatband tutorials. Craft suppliers like Craftsuprint stock printable stitch templates that help you mark holes evenly before you start sewing.
Pro Tip: Buy your replacement band slightly longer than you measure. You can always trim excess after fitting, but you can’t add length back once it’s cut too short.
How do you replace a hat sweatband step by step?
Felt and straw hats follow the same basic sequence, though straw needs gentler handling around the brim join.
- Remove the liner first. Most liners are attached with hot glue rather than stitched in, so warm the edges gently with a hair dryer before peeling it back, as repair forums recommend.
- Detach the old sweatband. Use a seam ripper along the stitch line rather than pulling, which can tear the felt or straw beneath it.
- Measure your head and the hat opening, then add a small amount of ease, roughly 3 to 5 millimetres, so the new band isn’t so tight it distorts the shape once it settles.
- Cut the new band to length on an angle, not straight across, so the join sits flatter once sewn.
- If the band has a reed inside it, withdraw the reed before cutting the tape, then rejoin the reed ends with a metal ferrule rather than cutting straight through it, per the hatblocks leather tutorial.
- Pre-punch your stitch holes with an awl before sewing. This keeps stitches even and stops the leather tearing under tension.
- Tack the band in place every 2 inches before final stitching, positioning the seam at the back centre of the hat where it’s least visible.
- Stitch the band fully, then reinstate the ribbon or trim over the top edge to hide the stitch line.
- Check the fit by trying the hat on before you glue the liner back down.
Pro Tip: Wax your thread with beeswax before hand sewing leather. It reduces abrasion on the leather edges and helps the thread glide through pre-punched holes instead of dragging and fraying.
Roughly 40 to 60 minutes of that time goes to hand stitching alone if you’re doing it by hand rather than machine. If your hat is antique, has a fragile felt base, or the brim edge is fraying, stop and get a quote from a hatter. A single bad cut on brittle felt usually can’t be undone.
How do you fit and finish the sweatband properly?
A technically correct band still looks wrong if it’s fitted carelessly.
Measure your head circumference where the hat naturally sits, then subtract for the thickness of your chosen band material. Cap-lining specialists note that a thicker terry band eats into internal crown space more than a thin leather one, so always measure with the actual replacement band on hand, not a guess.
- Position the seam at the centre back, ideally under where a bow or trim covers it
- Leave a touch of ease rather than fitting drum tight, since leather stretches slightly with wear
- Reshape or reblock the crown if the hat lost shape during the old band’s removal
- Inspect the finished job under good light for loose stitches or an uneven seam before wearing it out
Where can Urbancaps help beyond the repair itself?
Not every hat is worth saving, and that’s fine.
If cleaning is the actual issue rather than the band itself, Urbancaps’ guide to removing sweat stains might solve the problem before you touch a needle. If the hat has simply stretched out of shape, the stretching guide covers safe methods that won’t crack the felt.
- Care guides for cleaning and reshaping before you commit to a full band swap
- A catalogue of ready-to-wear options if repair isn’t worth the time
- Fast NZ shipping and local support if you decide buying new makes more sense than restoring old
Sometimes the honest answer is that a $15 casual cap doesn’t warrant three hours of stitching when a replacement costs less than the parts for a DIY repair.
Should you mend it or replace it?
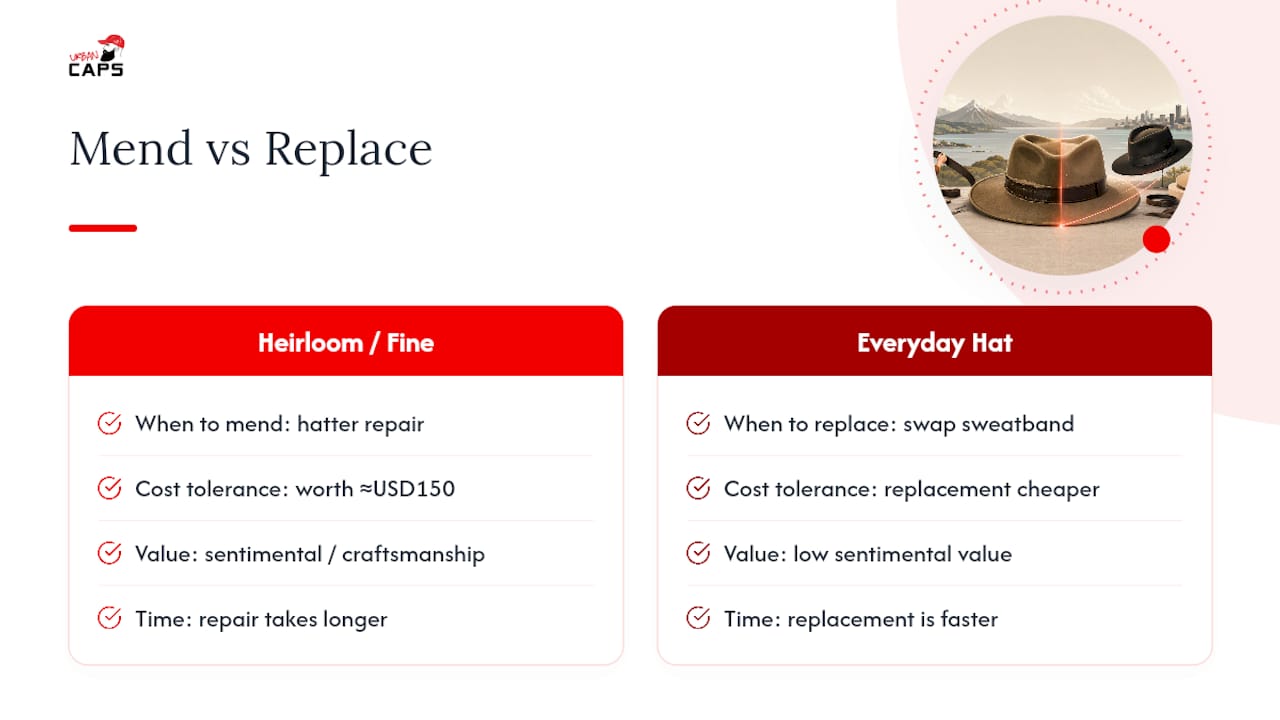
Sentimental value changes the maths entirely. A hat passed down from a parent, or a well-blocked vintage felt with a welted band, deserves a proper hatter’s attention even at USD 150, because that craftsmanship isn’t cheap to recreate.
Everyday caps and casual felt hats are a different story. If the sweatband has failed and the hat itself isn’t precious, replacement usually wins on cost and time. Inspect the hat honestly before deciding. Its condition, not your attachment to it, should drive the call.
— Urban
Ready to replace rather than repair? Here’s where to look
You have the option to purchase a new hat that is ready to wear today, avoiding the time and effort of mending, often with local stock and fast shipping available.

If your everyday cap has had it, the Graffiti Hip-Hop Baseball Cap offers a bold, sun-proof street style alternative without any stitching involved. For hats that see heavy outdoor use, the Travel Hat is built with sun protection in mind, a practical swap if your old felt or straw piece is beyond a simple band job. And if you’re after something with more personality on a night out, the Hip-Hop Bowler Hat makes a solid style replacement rather than a repair project.
Browse the full Urbancaps range and get a new hat on its way to your door in days, not weeks.
Where can you learn more or find real cost examples?
- The leather sweatband tutorial booklet covers reed removal, ferrule joins, and stitching technique in detail.
- Hat sweatband material specs compare terry, twill, and PU leather for absorbency and wear life.
- The Fedora Lounge repair thread shares real hobbyist cost and technique reports from people who’ve done the job themselves.
Sources
- Leather sweatband tutorial (hatblocks)
- Hat sweatband wholesale: materials, moisture & specs
- Could an amateur replace a welted sweatband? | The Fedora Lounge
FAQ
How do I replace a hat sweatband?
Remove the liner (usually hot glued), unpick the old sweatband with a seam ripper, measure and cut a new band with ease allowed, then stitch it in place with the seam at centre back before reattaching the liner.
Can you replace a hat band?
Yes, both the sweatband inside and the decorative hatband on the outside can be replaced, either through DIY sewing for casual hats or professional service for structured felt or vintage pieces.
Where can I find a replacement sweatband for my cowboy hat?
Craft and leather suppliers sell pre-cut leather sweatbands, and specialist hatters offer full replacement service, typically for USD 50 to USD 150 depending on whether cleaning or reblocking is included.
What material is best for a hat sweatband?
Cotton terry suits active outdoor wear because it absorbs the most moisture, cotton twill is a cheaper option for casual use, and genuine leather offers durability for hats you wear regularly over years.